






How to Make a Standing Desk
A DIY standing desk can be as simple as adding a riser to an existing desk or fitting a desktop to fixed legs or an adjustable frame. The right method depends on your space, budget and whether you need to alternate between sitting and standing. This do-it-yourself standing desk guide covers the main options and explains how to create a stable setup. Before starting, check the required height, desktop size, equipment weight and frame compatibility.
Decide What Type of Standing Desk You Want to Make
First, choose a design that matches how you plan to use the desk.
-
Convert an existing desk: A stable desk riser provides a quick, no-drill option for renters or first-time users. Avoid stacked boxes or books for regular use because they may be uncomfortable or unstable.
-
Build a fixed-height standing desk: Fixed legs and cross supports offer a simple, relatively affordable solution. The height must be measured carefully, as the finished desk cannot easily switch between sitting and standing.
-
Build an adjustable standing desk: A manual or electric frame provides greater flexibility for regular home-office use. Check its height range, load capacity and compatible desktop dimensions before buying. If you prefer a complete adjustable system, you can also compare the available standing desk options before deciding whether to build one yourself.
Plan the Size, Height and Load Capacity
A few measurements before assembly can prevent an uncomfortable or unstable result.
Choose the Desktop Size
Measure the available space and consider the equipment you use. For a DIY standing computer desk with two monitors, a desktop of around 150 × 70 cm or larger generally provides more comfortable working room. For more guidance, see Choosing the Right Desk Size: A Comprehensive Guide for Different Scenarios.
Find the Right Height
For a fixed desk, the desktop should sit close to elbow height when you are standing with relaxed shoulders. For an adjustable model, make sure the frame can reach comfortable heights for both sitting and standing.
Check the Load Capacity
Calculate the combined weight of the desktop, monitors, computer and accessories. Make sure the frame can support the complete setup and that the desktop falls within its recommended size and weight limits.
Materials and Tools You Will Need
The required materials will depend on whether you are making a fixed or adjustable DIY desk.
Desk Materials Needed
-
Desktop: Choose solid wood, MDF or plywood according to your budget and preferred finish. Solid timber can give a DIY build a warmer, more distinctive appearance, although it may require additional sanding and finishing. If you like this natural look but prefer a complete setup, compare it with a ready-made hardwood standing desk.
-
Desk legs or frame: Use fixed legs for a simple build or a compatible manual or electric frame if you want height adjustment.
-
Cross supports: Wood or metal supports may be needed to reduce movement, particularly when using separate legs.
-
Fasteners: Choose screws and bolts that suit the frame and desktop thickness.
Tools Needed
-
Measuring tape
-
Pencil
-
Drill or screwdriver
-
Spirit level
-
Saw, if the desktop needs cutting
-
Sandpaper
-
Safety glasses
-
Clamps when required

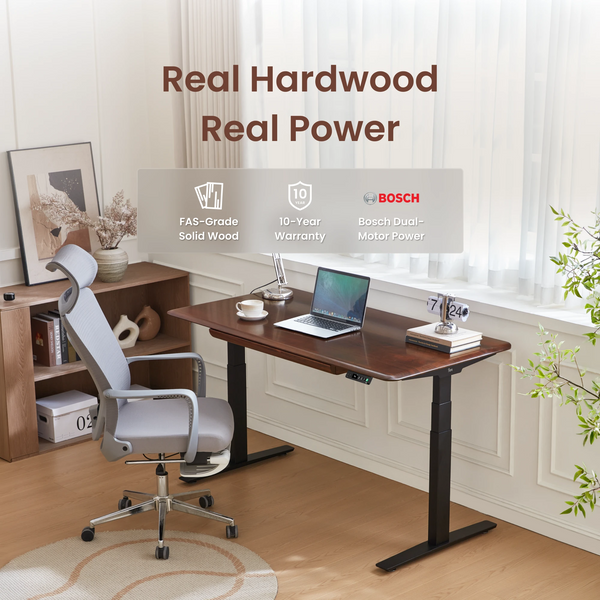
Sourcing a hardwood desktop and matching it with a suitable electric frame can be one of the more difficult parts of a DIY build. If you prefer a natural timber finish without preparing and fitting each component yourself, the 9amHome Pesk Pro Hardwood Standing Desk combines an FAS-grade hardwood desktop with a Bosch dual-motor frame in one complete setup.
How to DIY a Standing Desk Step by Step
Before you begin, clear a level working area and place a blanket or cardboard beneath the desktop to protect it from scratches.
Step 1: Measure and Mark the Desktop
Measure the space you would like to put your desk, and think about what you will put in your desk, and then buy the suitable size desk top for yourself. For example, a bigger than 150×70cm desktop will be better if you use 2 monitors in your daily life. You can check this article to know more about how to choose the size (Choosing the Right Desk Size - A Comprehensive Guide for Different Scenarios).

Step 2: Position the Legs or Adjustable Frame
Place the legs or frame on the underside of the desktop and centre them using your markings. Check that the overhang is reasonably even on both sides. If you are planning a DIY desktop standing desk, confirm that the frame’s width and load capacity suit the selected desktop before marking the mounting points.
Step 3: Pre-Drill the Mounting Holes
Drill shallow pilot holes at the marked points. These help keep the screws straight and reduce the chance of splitting the desktop. Check the desktop thickness and screw length so that you do not drill through the upper surface.
Step 4: Attach the Legs and Cross Supports
Return the legs or frame to the correct position and insert the mounting screws. Start each screw loosely, check the alignment and then tighten them gradually.
If the design uses separate cross supports, secure them between the legs to reduce side-to-side movement. The connections should be firm, but overtightening can damage the desktop or strip the screw holes.

Step 5: Install the Control Panel and Power Components
For an electric standing desk, attach the control panel beneath the front edge where it is easy to reach. Connect the motors, control box and power cable according to the frame manufacturer’s instructions. Keep the wires clear of lifting columns and other moving parts. Skip this step for a fixed-height desk.
Step 6: Turn the Desk Upright and Test Its Stability
Once the desk is built, ask another person to help turn it upright if the desktop or frame is heavy. Place it on a level floor, adjust the feet if necessary and test for front-to-back and side-to-side movement.
For an electric model, complete a full lifting cycle before adding your equipment. The frame should rise evenly without unusual sounds, stretched cables or contact with nearby furniture.
Step 7: Finish the Desktop and Manage the Cables
Sand any rough edges and apply a suitable surface finish if needed. Organise the wires with a cable tray, clips or reusable ties. For an adjustable desk, raise it to its highest position first so that every cable has enough slack to move safely.
If the measuring, drilling and wiring involved feels more complicated than expected, a fast-assembly standing desk can reduce the setup work while still providing adjustable height.
Additional Tips
- Adjustability: Consider using or adding adjustable legs or mechanisms to change the desk height.
- Cable Management: Plan for cable management solutions to keep your workspace tidy.
- Ergonomics: Ensure the desk height is comfortable for standing and working.
Set Up Your DIY Standing Desk Ergonomically
After assembly, make a few adjustments for comfortable everyday use.
-
Adjust the keyboard and monitor position: Keep your elbows near 90 degrees when typing, with the monitor directly ahead and its top around eye level.
-
Allow enough cable length: Raise an adjustable desk to its highest position before organising the cables. Leave enough slack to prevent pulling or unplugging.
-
Alternate between sitting and standing: Use the desk to change posture rather than stand all day. See How to Properly Use a Standing Desk for more guidance.
DIY Standing Desk vs Ready-Made Standing Desk
A do-it-yourself desk gives you more control over its dimensions and materials, while a ready-made model provides a more predictable setup.
|
Factor |
DIY Standing Desk |
Ready-Made Standing Desk |
|
Cost |
Varies by materials and tools |
Clear upfront price |
|
Customisation |
Flexible size and materials |
Limited to available designs |
|
Assembly |
Requires measuring and drilling |
Components work as one system |
|
Stability |
Depends on build quality |
Tested as a complete desk |
|
Best for |
Custom spaces and DIY users |
Convenient, predictable setup |
If easy assembly matters more than complete customisation, the 9amHome Robin Standing Desk offers a practical alternative. It arrives largely pre-assembled and includes dual-motor adjustment and integrated cable management, reducing the measuring, drilling and wiring involved in a typical DIY project.
Common DIY Standing Desk Mistakes to Avoid
-
Setting a fixed desk too high: An excessive height can cause raised shoulders and bent wrists. Measure carefully because fixed legs are difficult to adjust later.
-
Using screws that are too long: Check the desktop thickness before drilling to prevent screws from breaking through the upper surface.
-
Ignoring frame compatibility: A desktop that is too narrow, thick or heavy may not work safely with the selected frame.
-
Forgetting cable movement: Cables that look tidy at sitting height may become stretched or unplugged when the desk rises.
-
Testing only at sitting height: Check stability at the normal standing height and maximum extension, where movement is often more noticeable.

Conclusion
A cool standing desk design still needs to be comfortable, stable and suitable for your equipment. Measure carefully, select compatible parts and test the completed desk before regular use. DIY offers greater control over size and materials, while a ready-made 9amHome home office standing desk may be more practical if you prefer easier assembly and predictable performance.
If you have experience making a DIY desk, feel free to share your story or ask questions in the comments!
The other articles you might be interested in are:
What are the Differences between Cheap and Expensive Standing Desk?
Frequently Asked Questions
How do I determine the right height for my DIY desk?
- Standard Height: Most desks are around 28-30 inches high. Choose a height that allows your elbows to be at a 90-degree angle when typing for standing desks.
- Custom Height: Measure based on your height and comfort; adjust accordingly if you’re incorporating a sit-stand feature.
- Choose adjustable desks: Buy a adjustable desk leg for your DIY desk and it will help you to change the height you like.

How can I make my DIY desk ergonomic?
First, consider using adjustable legs or a lift mechanism. Second, ensure your monitor is at eye level to reduce neck strain. Third, use a keyboard tray to keep your wrists in a neutral position.
Can I make a DIY desk for multiple purposes?
Absolutely! Design it with a spacious surface and consider adding features like cable management, shelves for storage, and adjustable height options to cater to different activities.

Leave a comment